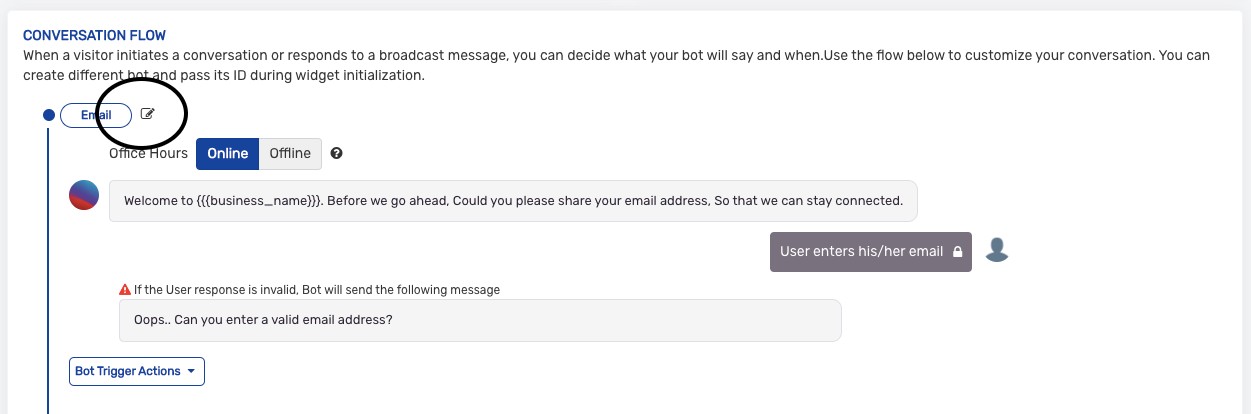
You can setup the Hippo BOT and it will automatically intract with the users according to the provided information. Here are the basic steps to create a BOT:
1. Create A Chatbot from scratch
2. Create A Chatbot from templates
Let’s Create a BOT from scratch here.
Click on the “Create A Chatbot from scratch” and you will be redirected to the BOT detail page.
Now enter the BOT name on top right side of the screen and click on the check tick to save the BOT name.
Now scroll to the “CONVERSATION FLOW” section and you can see the first question of the BOT by default.
Following are the response types available on the Hippo Bot
| Type | Description |
|---|---|
| Email is required from the customer | |
| Name | Text value is required from the customer |
| Number | 0-9 any input required from the customer |
| Phone Number | Phone number is required and counter code list visible to customer |
| Plain Text | Any text value required from the customer |
| URL | Ask for the URL from the customer |
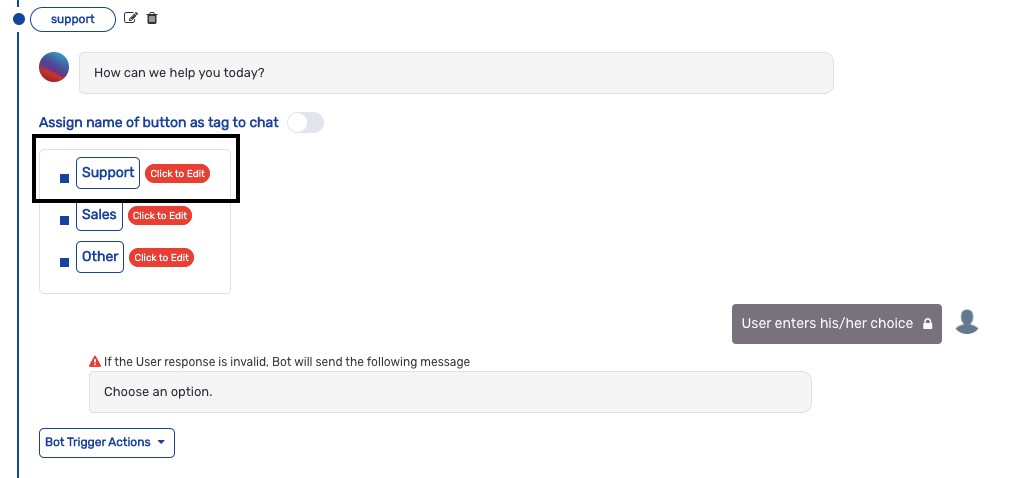
| Button | Button option is visible to customer |
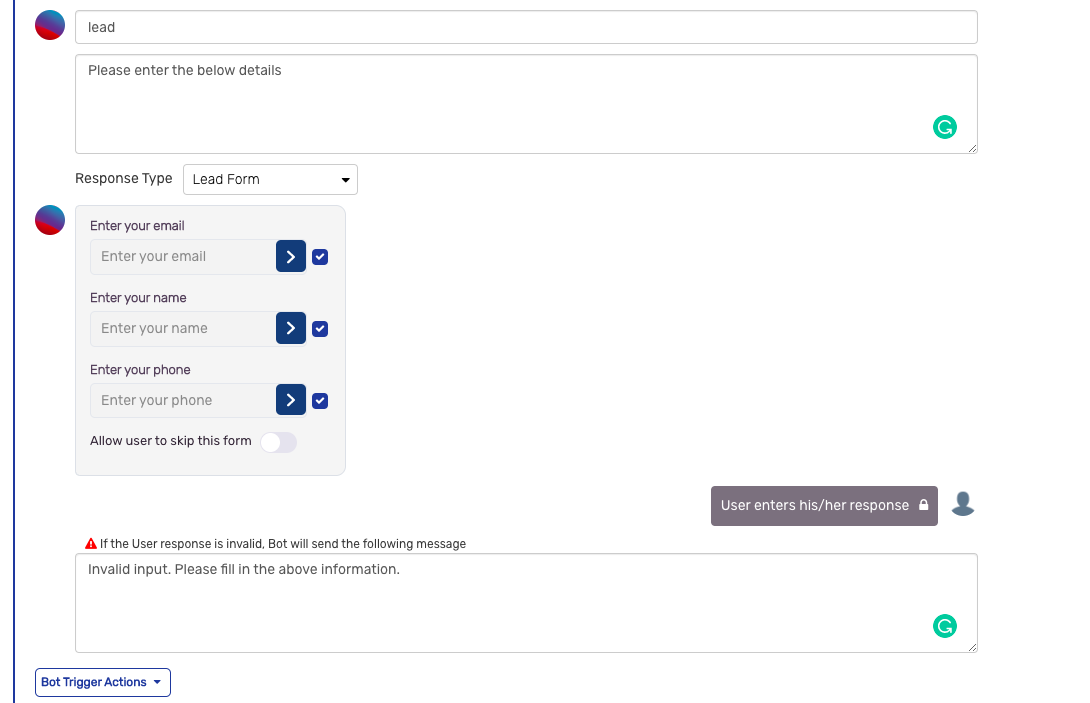
| Lead Form | Lead form is sent to customer for capturing the Name, Email and Phone number, and this value is added corresponding to the user |
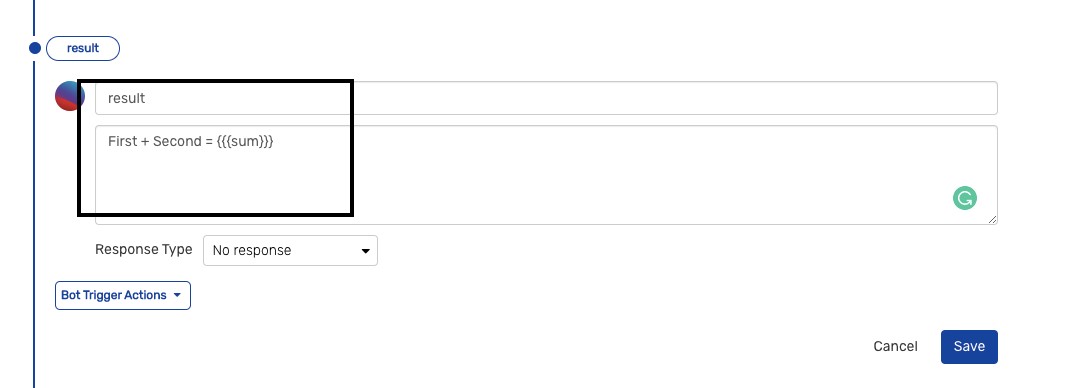
| No response | No input required from the customer and next question will be sent by the Bot |
| Image | Upload the Image/Gif and it will sent to the customer |
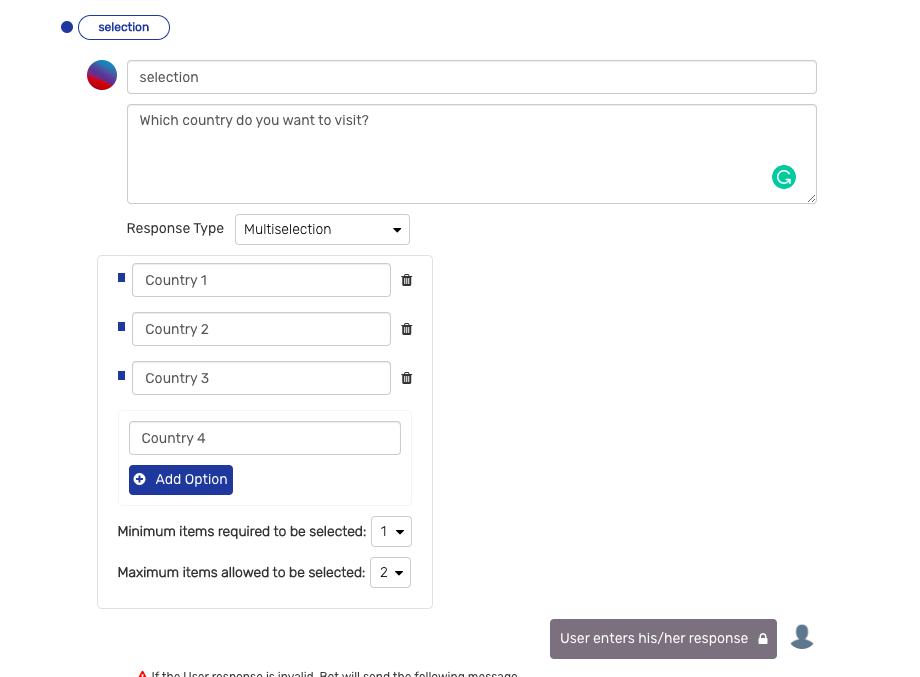
| Multiselection | For asking for the multiple option from the customer, also maximum and minimum selection can we control while creating the question |
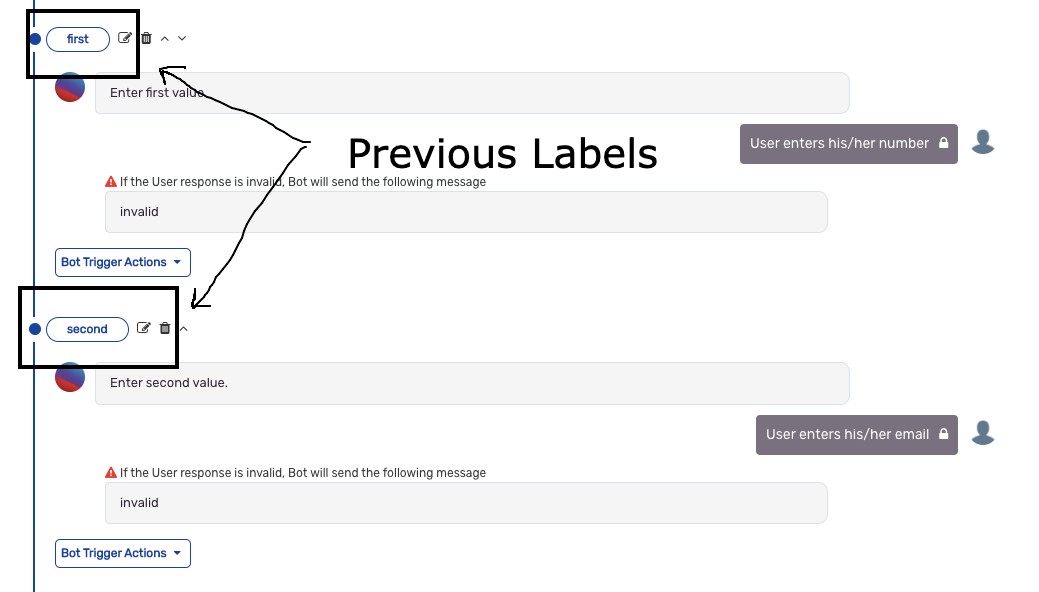
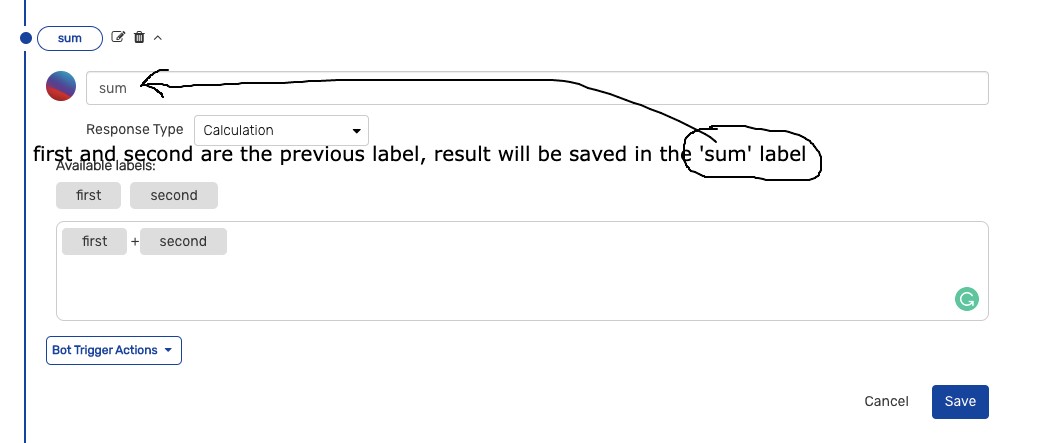
| Calculation | For calculate the simple formula with this option. Add the formula with the “Available labels” and output will be saved corresponding to the label |
| Embedded Video URL | For adding the video inside the Bot |
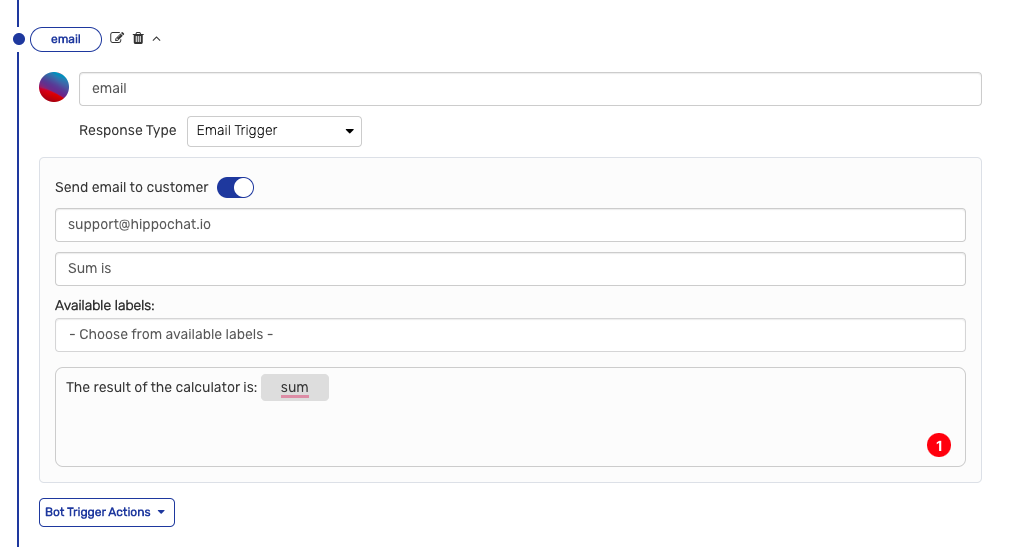
| Email Trigger | This option is send the email with the available label data |
| Address | If you want to get the latitude and longitude from the customer |
| Date | Bot will ask for the date from customer. You can control the future, past and All dates |
| Time | Bot will ask for the time |
| Date & Time | This option first ask for the date and then time from the customer |
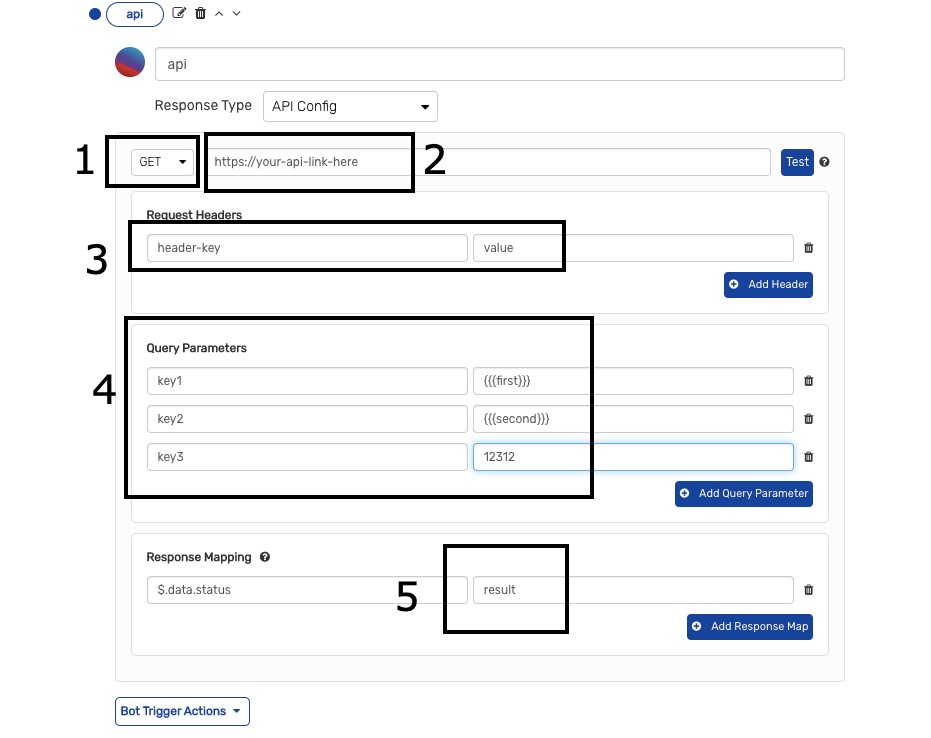
| API Config | Bot will hit the API on the based upon the above labels |
| Attachment | Bot will ask for the attachment from the customer |
| Payment Plans | Bot will ask for the payment from the customer |
| Ticket Support | Bot ask the question from customer and then create a ticket on the Hippo platform |
| Assignment Card | For assign the chat to agent |
Simple Bot Question
Click on the “ADD CUSTOM QUESTION” button for adding the option. Now question form will open. Enter the label, Question and choose the response type and then message for invalid response. After this click on the “save” button. The Bot question is saved.
Button Options
Choose the Button response type and then button form will be shown. Now add the first button title, which will be shown to the customer. You can add as many buttons in the same question. Recommonded options is not more then 10. After the last option add the blank button option before click on the save button.
Button Type:
| Action | Description |
|---|---|
| Assignment | Assign the chat with in the selected team |
| Continue Chat | Tiggered the next question |
| Open Link | Open a entered link on browser |
| Audio Call | Open the phone diler for make a call |
| Callback | Send the callback with the entered data to the app side. (Develop needs to handle the callback mentioned in the integration doc) |
After click on the save button, you can create the nested Bot flow, which mean you can split the flow. For example on first option choose the flow will be different and on the second button the flow of the bot will be different.
Click on the Button and add the nested Button options according the Bot flow.
Lead Form
Choose this response type and then 3 fixed option will be appears, you can also enable the skip option and based on this option customer can skip this question if enabled.

Multiselection
Similar to the Button this option works. only major difference is that customer can choose multiple choices in this question. And you can’t create the nested Bot in this response type.

Calculation
Based upon the above label you can create the formula. For sum example first we’ll ask the two values and then in the calculation type it will ask for the formulas. Note that only number labels should be visible.


Email Trigger
Similar to calculation You can send the entered data to through email to you as well to the customer is customer email exists.

API Config
Hippo Bot is capable to hit Get and Post APIs and use the response further inside the BOT. Lets take an example of GET API.

Response can be map with the start from the $ sign.For exp API output is {
“statusCode”: 200,
“message”: “Successfully.”,
“data”: {
“status”: “123”
}
}
$.data.status will capture the 123 in “result variable”.
Note: Save button will locally save the changes. Data will be saved only after click on the “Save and publish button once all the changes done”
If you want to edit the Bot question then click on the edit icon just right side of the label, the question form will be open. Change the question and the save it.
After made the changes you need to click on the save and publish button to update the Bot.
